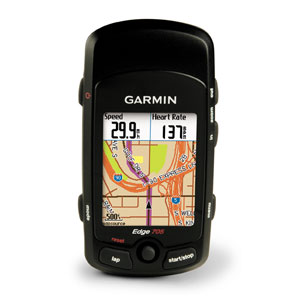
I thought I’d talk about some cycling accessories that I actually use, instead of the “gimmicks” that seem to be hawked these days. I’ve got a Garmin Edge 705 cycling gps that works really well. It has a color screen, and you can customize the display page to include what you want to see while riding. It’s a nice package. Of course, if you just want to record a track while riding, just hit the start button and put it in your pocket. Either way, don’t forget to hit the stop button when you’re done. I’ve forgotten that more than once. Maybe it was twice, I can’t remember.
The RideWithGPS website works very well to manage your courses and ride history, and speaks Garmin very well. You can easily plan, edit, and export routes (courses in Garminspeak), and upload history from your rides. You can also turn a ride into a route, if you want to share it with cycling friends. If you opt for one of the subscription plans, you can add advance notification of turns to the exported file.
Back on the 705, you can easily upload routes to the “Courses” directory (as a file with a “.tcx” extension). and download the results from the “History” directory, also with a “.tcx” extension. You can then upload the .tcx file to RideWithGPS to look at average speed, cadence, distance, and climbing/descending info. It also shows the gradient, but I can’t speak to the accuracy of that info.
I use OpenStreetMaps on my 705, and they work very well. There’s no need to pay the “Garmin Tax” and buy one of their maps. You can select the areas you want, and download them. Uploading the map file (gmapsupp.img) is simple enough. If you use these maps, please support this worthwhile project.
if you want a tutorial on using OpenStreetMaps on your Garmin device, go to DCRainMaker’s website and follow the directions. It is literally as simple as he says. Additionally, his site is a great resource for bicycling information and product reviews in general – it’s well worth the time to read.
If you are looking for turn-by-turn navigation, cadence, speed, and other information, the Garmin 705 is a good choice. Since it isn’t the latest and greatest unit out there, the prices are very reasonable – around $100 give or take, usually including mount and speed/cadence sensor.
Compared with the $1000+ units, the Edge 705 is a very smart choice if it’s functionality meets your needs. If you want the latest gee-whiz bells and whistles, then I guess you’ll have to pay for that.
if you have questions about working with routes and ride results, or using OpenStreetMaps on your 705, drop me a note and I’ll try to help.
UPDATE: I ordered a GUB GPS mount off ebay for my 705, and it fits and works really well. It clamps on the handlebar next to the stem, and has a gopro-style mount underneath for a camera or a light. A nice, functional accessory.


