
Now that I’ve laid out my reasons for trying a different type of sensor, let’s dig in. We need a couple of libraries that the DHT22 sensors didn’t need, so we should go ahead and get them installed.
First, let’s install the smbus2 library. At a command prompt, type:
sudo pip install smbus2
Now, let’s install the library for the SME280 sensor. At a command prompt, type:
sudo pip install RPi.bme280
That takes care of the additional libraries we’ll need for the python script.
Now, let’s connect the sensors to the Raspberry Pi. I’m using the model 4 rev B, so I have a 40-pin GPIO header. We’re going to use six pins to connect our two sensors. We’re going to connect each sensor to it’s own 3.3v source and it’s own ground. We’ll use RPi4 pins 1 and 6 for 3.3v and ground for the upstairs sensor, and pins 17 and 9 for 3.3v and ground for the downstairs sensor. We’ll connect the two clock lines together and they will connect to RPi4 pin 5; then we’ll connect the two data lines together and they will connect to RPi4 pin 3. Since the two sensors will have a unique address on the bus, we can connect them electrically but interrogate them separately.
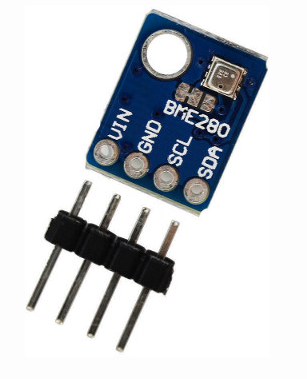
 We also need to make a small alteration to one of the sensors to change it’s address on the i2c bus. In the following image, the red mark indicates the we are removing the connection between the left and center pad, and adding a connection from the center pad to the right pad. We are only altering one of the two sensor boards in this manner. The unaltered sensor will have bus address 0x76, and the altered sensor will have address 0x77. The test script below is coded so that the upstairs sensor is the unaltered one, and the altered sensor is the downstairs sensor.
This sensor test script interrogates the sensors and then displays the returned values separately, followed by a string containing the data. Note that python is sensitive to indentation. I’ve added a line of code to convert the celcius temperature into fahrenheit. This line is optional. The full code for our test script follows.
#!/usr/bin/python3

import time
import smbus2
import bme280

port = 1
upstairs_addr = 0x76
downstairs_addr = 0x77
bus = smbus2.SMBus(port)

calibration_params_upstairs = bme280.load_calibration_params(bus, upstairs_addr)
calibration_params_downstairs = bme280.load_calibration_params(bus, downstairs_addr)

#exit()

while True:
    # interrogate the sensors and supply the calibration data we obtained earlier
    upstairs_data = bme280.sample(bus, upstairs_addr, calibration_params_upstairs)
    downstairs_data = bme280.sample(bus, downstairs_addr, calibration_params_downstairs)

    # the compensated data
    print(upstairs_data.id)
    print(upstairs_data.timestamp)
    print(upstairs_data.temperature)
    ftemp_upstairs = upstairs_data.temperature * 9/5.0 + 32
    print(ftemp_upstairs)
    print(upstairs_data.pressure)
    print(upstairs_data.humidity)

    # in string format
    print(upstairs_data)

    # the compensated data
    print(downstairs_data.id)
    print(downstairs_data.timestamp)
    print(downstairs_data.temperature)
    ftemp_downstairs = downstairs_data.temperature * 9/5.0 + 32
    print(ftemp_downstairs)
    print(downstairs_data.pressure)
    print(downstairs_data.humidity)

    # in string format
    print(downstairs_data)

    time.sleep(15)
Once this is working and successfully retrieving and displaying the sensor data, we’ll move on to the changes needed to our data logger script.