Rekindling an old interest

I was over at my friend Greg’s house and he was shooting a new crossbow.  It’s a very nice one – fast, accurate and fun to shoot.  Greg is a very good shot with it. and I acquitted myself pretty well.  I’ve been wanting to learn to shoot a bow for a long time, and I’ve never actually taken a step towards learning.  Those few minutes shooting a crossbow at Greg’s brought back my interest in learning to shoot a bow.

I registered at archerytalk.com and started looking at used bows in the classified forum.  I found a couple that looked decent, and read some reviews to see if there were any problems with the bows.  I decided to make an offer on a Bowtech Fuel package that included a sight, rest, stabilizer, soft case, and some arrows with field points.  We agreed on a price and I sent a check.  He received the check, and a few days later shipped everything to me.  I got it and it was just as nice as he had described.

Being a complete noob at archery, I decided the smart thing to do was to get the bow checked out at a local shop and have it set up for me.  Greg and I went to Herndon Archery in Herndon, KY.  He looked it over and said the strings looked almost new, and the brace height was right at the spec.  He put it on the drawboard and said the cam timing was perfect, and the draw weight was between 38 and 39 pounds.  He gave me a release and an arrow and had me draw the bow.  He said the draw length needed to be lengthened to be a better fit for me.  On this bow the draw length can be set by moving a module.  He lengthened the draw length by an inch, and had me draw the bow again.  It felt better to me and he said it looked better to him as well.

He gave me some hints about foot position, bow hand position, and some suggestions about finding my own anchor position.  Now to see if I can actually hit the target with a bow.

The first few shots

Greg has a target at his house, with a nice backstop behind it.  Not knowing what to expect with the first few shots, a backstop seemed like a pretty good thing to have.

I started at 10 yards.  The first few shots all hit the target.  Not too bad if I’m honest, and I was a little surprised.  Tried a few more shots at 10 yards and the group looked halfway decent.

I moved back to 20 yards and tried a few more shots.  These were a little low, but the left-right alignment was pretty good.  Wound up shooting about 20 shots at the 20 yard distance and the grouping was decent.

Moved back to 30 yards, and the group is definitely low.  Greg thought the bottom pin might be set for 25 yards, so I moved up 5 yards.  Now the arrows are grouping all around the center.  Not the best group, but not scar-me-for-life ugly.

It was fun.  I think it will take practice to become a good shot, but if I pay attention to the little details I can become a better shot.  I need to pick up some new arrows.  The wrist release I bought from Herndon Archery is working well for me, and the target is fine for practicing.

Raspberry Pi project – some conclusions

After making the changes discussed earlier and monitoring the values and the graphs of those values, I can draw some conclusions about the interior conditions at the cabin.

First, conditions downstairs are more stable than the upstairs, both temperature and humidity do not fluctuate nearly as much as they do upstairs.  Makes sense as there are only two small windows downstairs, while the upstairs has five windows.

Second, it is cooler upstairs than downstairs – but a larger difference than I would have expected.  It is 4-5 degrees cooler upstairs, and more humid by 4-5 percent.  Some of the humidity difference is attributable to the temperature difference, but not all of it.  Solar heating during the day does warm the upstairs more than the downstairs – presuming that the sun can supply the solar energy.  On cloudy days, you’re on your own.

But my main interest was to see how close to freezing it gets inside, with no heat source to maintain a set temperature.  I can’t risk frozen pipes, so I drain the water system and put RV antifreeze in the traps and the toilets.  Maybe I’ve been wasting time and RV antifreeze when it isn’t really needed, but now I have a reasonably reliable way to monitor the situation.

Raspberry Pi project – correction factors

As I mentioned earlier, I was suspect of the humidity values returned by the DHT22 sensors.  So I used a hygrometer to get a separate reading – not that the hygrometer is perfect, but my experience over the past couple of weeks was that it agreed with another hygrometer, the temperature and humidity were consistent, and believable for cool winter conditions.

I placed the hygrometer close to the sensors and gave it a couple of hours to settle in.  The temperature matched within a degree, so that’s great.  Not so great on the humidity side, I applied a correction factor of -16 to get the reported values in the ballpark.  Now the sensors are both reporting values that match the hygrometer within a percent.  A significant improvement.

To move one of the sensors upstairs, I took some cat6 cable and soldered the twisted pairs together to make a 4 conductor cable.  One conductor won’t be used with the DHT22 sensors, but I will need it for the BME280 sensors when I swap them.  I ran the cable upstairs, which took a lot longer than it took to type this sentence.  It’s a long story, don’t ask.  Connected everything up and booted the pi.

Upstairs temperature was fine, but the humidity value (again) was off the charts.  So I decided to try the +5v pin instead of the +3.3v pin on the pi for the upstairs sensor, as the connecting wire is now about 15 feet long.  The humidity value came back to reality and has stayed that way for a few days now.

I’ll leave the DHT22 sensors in place for now and see how they behave.  I am definitely going to swap the sensors, but there are higher priority tasks to do, especially since the current sensors seem to be behaving for now.

Raspberry Pi project – swapping sensors, part 2

Now that I’ve laid out my reasons for trying a different type of sensor, let’s dig in.  We need a couple of libraries that the DHT22 sensors didn’t need, so we should go ahead and get them installed.

First, let’s install the smbus2 library. At a command prompt, type:

sudo pip install smbus2

Now, let’s install the library for the SME280 sensor. At a command prompt, type:

sudo pip install RPi.bme280

That takes care of the additional libraries we’ll need for the python script.

Now, let’s connect the sensors to the Raspberry Pi. I’m using the model 4 rev B, so I have a 40-pin GPIO header. We’re going to use six pins to connect our two sensors. We’re going to connect each sensor to it’s own 3.3v source and it’s own ground. We’ll use RPi4 pins 1 and 6 for 3.3v and ground for the upstairs sensor, and pins 17 and 9 for 3.3v and ground for the downstairs sensor. We’ll connect the two clock lines together and they will connect to RPi4 pin 5; then we’ll connect the two data lines together and they will connect to RPi4 pin 3.  Since the two sensors will have a unique address on the bus, we can connect them electrically but interrogate them separately.

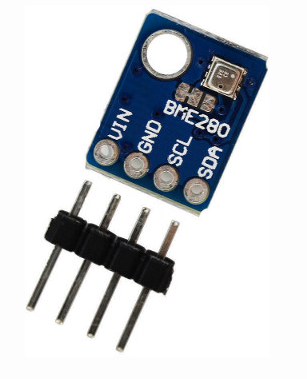
We also need to make a small alteration to one of the sensors to change it’s address on the i2c bus.  In the following image, the red mark indicates the we are removing the connection between the left and center pad, and adding a connection from the center pad to the right pad.  We are only altering one of the two sensor boards in this manner.  The unaltered sensor will have bus address 0x76, and the altered sensor will have address 0x77.  The test script below is coded so that the upstairs sensor is the unaltered one, and the altered sensor is the downstairs sensor.

This sensor test script interrogates the sensors and then displays the returned values separately, followed by a string containing the data. Note that python is sensitive to indentation. I’ve added a line of code to convert the celcius temperature into fahrenheit. This line is optional. The full code for our test script follows.

#!/usr/bin/python3

import time
import smbus2
import bme280

port = 1
upstairs_addr = 0x76
downstairs_addr = 0x77
bus = smbus2.SMBus(port)

calibration_params_upstairs = bme280.load_calibration_params(bus, upstairs_addr)
calibration_params_downstairs = bme280.load_calibration_params(bus, downstairs_addr)

#exit()

while True:
    # interrogate the sensors and supply the calibration data we obtained earlier
    upstairs_data = bme280.sample(bus, upstairs_addr, calibration_params_upstairs)
    downstairs_data = bme280.sample(bus, downstairs_addr, calibration_params_downstairs)

    # the compensated data
    print(upstairs_data.id)
    print(upstairs_data.timestamp)
    print(upstairs_data.temperature)
    ftemp_upstairs = upstairs_data.temperature * 9/5.0 + 32
    print(ftemp_upstairs)
    print(upstairs_data.pressure)
    print(upstairs_data.humidity)

    # in string format
    print(upstairs_data)

    # the compensated data
    print(downstairs_data.id)
    print(downstairs_data.timestamp)
    print(downstairs_data.temperature)
    ftemp_downstairs = downstairs_data.temperature * 9/5.0 + 32
    print(ftemp_downstairs)
    print(downstairs_data.pressure)
    print(downstairs_data.humidity)

    # in string format
    print(downstairs_data)

    time.sleep(15)

Once this is working and successfully retrieving and displaying the sensor data, we’ll move on to the changes needed to our data logger script.

Raspberry Pi project – swapping sensors

I’m a little suspect of the humidity readings I get from the DHT22 sensors.  I suspect that they’re reporting higher humidity than is actually the case.  I did some research and I’m not alone in this concern.  It’s not a huge concern by any means, my primary interest is with temperature, but since I’m logging and graphing the data, why not try to make the data as accurate as possible?

That research led me to the BME280 sensor module.  It communicates through the i2c bus, using an address on the bus to differentiate between multiple devices on the same bus.  The BME280 has two available addresses depending on how a jumper on the module is configured.  Since I’m using two sensors that will work out well.

The difference that you’ll need to deal with first is that the BME280 sensors use four connections to the Pi, not three as the DHT22 sensor does.  So you’ll need an extra wire between the sensor and the Pi.

Normally you’d use a breakout board to easily handle the multiple connections needed, but because I don’t foresee adding other sensors at this point, I’m just going to solder the wires for data and clock together.  I’ll continue to use separate 3.3v and ground connections for each sensor.  If that changes, I can easily add a breakout board later.

The python script that interrogates the sensors and saves the data into the rrdtool database will require some changes.  These sensors have calibration data available, and we’ll use that to be sure the readings are as accurate as possible.  We’ll also need different libraries to use the i2c bus and to communicate with the BME280 sensors.  Both of these libraries can easily be installed using pip.