An experiment

I’ve made some fit changes to the Merckx, looking to improve my position on the bike and to be more comfortable on long rides.  It seemed that I was consciously shifting back to get to the proper position on the saddle, so I moved the saddle forward about 10mm.  That did help, but after a couple of rides I decided to swap out the stem for a shorter one.  Another improvement.  One of the guys on the Wednesday night shop ride suggested I might want to lower my saddle a bit, so I lowered it about 5mm.  This seemed to be better still, so I’m going to leave it as is for now.  After a few more rides, I may tweak here and there, but I want to get some miles in before making any more changes.

I’m also considering trying a new crankset on the Merckx.  The main change is to try 160mm crankarms, 10mm shorter than the 170mm Campagnolo crankset that is on the bike now.  The chainrings are the same tooth count, so the chain will work, and the front derailleur should only need a tweak or two.

Curious to see how the shorter crankarms may work for me.  I have enough info from previous rides to try and make an objective assessment, but the seat of the pants may be telling as well.

The new cranks use a square taper BB, so it’s not a direct swap.  Still, not too difficult to do – I’m thinking an hour or less should be enough to swap them around.  I’ll need to raise the saddle 10mm or so and probably forward just a bit from the present position.  Since the weather is improving too, good opportunity to get some road miles in and see how they feel.

A Merckx update

I’ve replaced a Campagnolo Veloce 13-26 cassette with a Chorus 12-30, and replaced the short-cage Veloce rear derailleur with  a medium-cage version.  I decided to replace the chain at the same time.  So now the Merckx has 50-34 up front, and 12-30 in the back.

I checked the derailleur hanger alignment, and it was in a little at the bottom.  I’ve adjusted this before, and the bike has not been beaten up or laid down on the RD side.  Not sure why it doesn’t want to hold the alignment.  It might be time to get a replacement hanger, just in cases.  I did order a replacement hanger today, hopefully it’s the right one.

No issues with the swap, and the shifting adjusted easily.  All ready to go now, with climbing-friendly gears.

Wheel bearing replacement

I replaced the rear hub wheel bearings on the Merckx today.  Knocking the old bearings out was easy enough and I managed not to lose the spacer between the bearings.

The new bearings are in the freezer, ever so slightly reducing the outside diameter.  I warmed up the hub with a heat gun, the intent being to slightly increase the ID where the bearings sit.  Installed the bearings, using a socket that was slightly smaller in diameter than the bearing, but large enough to contact the outer race.  I even remembered to put the spacer in the hub before installing the second bearing.  Bearings are done and the slight play I noticed earlier is gone.

While the tires were off, I put the wheels in the truing stand and checked them out.  The rear wheel is good, but the front needed a tweak or two.  All nice and true now.

I replaced the 25mm Michelin Pro4 tires, as they measure 28mm on the Boyd rims.  There was very little clearance with these tires on the Merckx frame, so a single broken spoke would have probably rendered the bike unrideable.  The new tires went on easily and measure 24mm, so there is at least a reasonable amount of clearance.

The tires ride well, and the Merckx seems to have picked up the performance a notch or two.  Not bad for a few minutes of work.  Looking forward to the next longish ride.

A little fine-tuning

The first longish ride on the Merckx is finished, and I have a little work to do.  First, the rear caliper was twisting a little, and pushing the left pad against the brake track.  I don’t really need any help slowing down when I’m trying to go forward so that needs to be addressed.  Second, the rear wheel seemed to have a little bearing play that shouldn’t be there so that needs to be investigated.

I tightened up the recessed nut for the rear caliper and it’s better, but the real problem might be that the housing is a little too long and is pushing the caliper.  I’m going to ride it as-is and see how it goes on the next ride.  If it’s not working properly, I’ll shorten the housing.

The wheels have cartridge bearings, so there isn’t much to adjust compared to cup and cone bearings.  The caps that hold the bearings in place were not completely tight, so I snugged them up and reinstalled the wheel.  There is no bearing play now.  I checked the shifting and it’s good.

I ride a fairly small frame, so there isn’t a lot of exposed seatpost.  I had mounted a red blinky light on the seatstay of the CAAD8, but on this frame the seatstays are shaped, not round so the mount doesn’t work so well.  I have a nice rubber mount for the light that wraps around the seatpost, but then I can’t fasten the seatbag in place.  So I ordered a top tube bag that sits on top of the top tube and fastens around the tube and the stem.  You can easily get at the items in it while riding, and it isn’t in the way.  Hopefully this will turn out to be a good solution to the blinky light vs seatbag war.

I’ll know in a couple of days.

All done, or are we?

The more complicated tasks are done now, so we’re on to the final few bits (and bobs, if you prefer the British lexicon) of the build.

NOTE:  Self-fusing silicone tape is great.  Sticks to itself but leaves no sticky residue like other tape.  It doesn’t get slimy in summer heat.  Definitely a good product to use on the handlebars.

Taped the cables to the handlebars using silicone tape in preparation for wrapping the bars.  Wrapped the bars using the Lizardskin 3.2mm tape.  Looks good, has a good amount of padding so should be comfortable to ride.  And to my surprise, there was actually a few inches left over.  It seems like other bar tape has been just barely long enough.  Inserted the plugs and that’s done.

Marked the top on the steerer – need to cut 8mm above the mark.  Removed the front wheel and brake from the fork, and then the fork came off.  Over to the bike shop to have the steerer cut.  They reset the crown race, it wasn’t fully seated.  Picked up a 10mm spacer since the extra spacers I have are for a 1” steerer.   I’m leaving some extra steerer length until the handlebar fit is dialed in, then I’ll cut it to the final length.  No hurry on that task.

Checked the torque on the brake calipers, the derailleurs, the seatpost and saddle clamps, and made sure the shifting is still dialed in.  All good.  Now just need some decent weather for a maiden voyage and some photos.

Remember, without photos it didn’t happen.

Ups and downs

Usually, descending follows climbing, more as a reward for the work of climbing as anything else.  Used the old BB guide and cut the new Campagnolo BB guide to fit, installed the cable guide, cable liner, and the cable runs are clean.  Cut the front derailleur housing (the only housing for the front derailleur), and installed it.  Cut the front piece of housing for the rear derailleur and installed it.  Checked to be sure the housing looks good at lock to lock turns, and it’s good.  Cut the second piece for the rear derailleur.  Shift housing is cut to length, lubed, and installed – cables are run.  Need to set the low limit screws and fasten the cables to the derailleurs.  Then the chain, then adjust the derailleurs.

Clamped the rear derailleur cable and adjusted the high limit by eyeing the jockey wheels and the small cog – close enough for a start.  The low limit can’t be adjusted until I put the chain on, so that the derailleur can be properly spaced away from the large cog using the B screw.  Installed the chain, which needed to be shortened by one link.  This was because the new crankset is a 50/34 compact and the old one was 52/39.

The front derailleur does not shift up or down.  Will have to pull the cable out and see if I can figure out the problem.  Until I can shift to the big chainring, I cannot finish the rear derailleur adjustments.  FIGURED IT OUT!  There are two holes for the cable in the shifter body, and I had the cable in the wrong one.  Once I fixed that the front derailleur shifted fine.  Now I can work on the rear derailleur adjustments.

Was having trouble getting the rear derailleur to shift onto the big cog, so I suspected the derailleur hanger wasn’t straight.  Sure enough, it wasn’t, so I adjusted that and then the rear shifting was easy to adjust.  Installed the pedals, and crimped caps on the cut cable ends.

Now we can change gears for climbing and descending, which is a plus.

Now to finish up the build…

Moving forward by preparing to stop

Moved the handlebars with the brifters installed, and then removed the old bar tape and cables.  Cleaned the old adhesive off the handlebars.

Decided to run the brake cables first.  Replaced the cables, then the housings.  Next is to cut the housing to length, after taping the housing in place on the handlebar.  Remembered to pull hard on the brake levers to be sure the housing is fully seated in the brifters before marking the length and cutting.

Cut the housing and installed the front brake housing and cable.  The front pads were properly aligned so no changes needed there.  Cut the front housing for the rear brake cable and installed it.  Got the rear brake cable and housing done and the brake pads and caliper adjusted.  Used tri-flow to lubricate the cables.

Now on to the shifter cabling…

New bike project hiccup #2

I removed the brake calipers from the CAAD8 frame, but cannot mount them on the Merckx frame.  The reason?  The recessed nut used to attach the rear caliper isn’t long enough for the thicker brake bridge on the carbon frame.  The one for the front caliper might work OK, but the rear one isn’t even close.  I’ve ordered a couple of longer ones, so once they arrive I should be able to mount both brake calipers and then continue with the project.

I can turn the length down on the lathe if they’re too long, but hopefully they’ll just work out OK.  Riiiightt…  That always works for me.

UPDATE: The recessed nut for the rear caliper was about 4mm too long.  Once that extra was removed, the calipers are now both installed and torqued.

There’s always something you hadn’t considered.

New bike project and hiccup #1

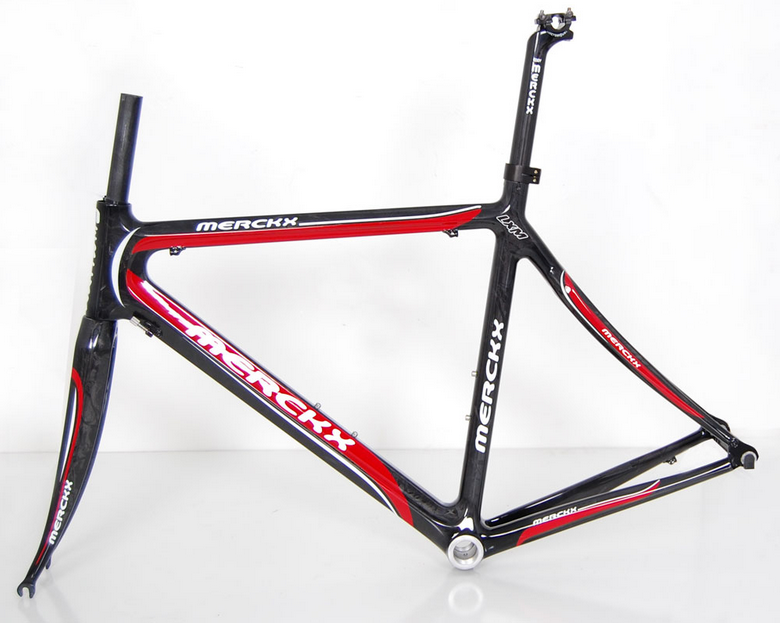
Well, at least a new frame.  I picked up an Eddy Merckx LXM carbon fiber frame a couple of years ago, and now i’m finally getting around to doing something with it.  My plan is to swap the entire Campagnolo group from the CAAD8 frame to the Merckx frame, and along the way to replace the cables/housings, clean up everything, and replace the bar tape as well.  I don’t need many parts for this, mostly consumables like cables and cable guide, plus bar tape.  The existing stem may or may not work with this frame, that will have to wait until it’s actually rideable to make that determination.

Hiccup #1: The bottom bracket shell was English thread, but it appears to have been sleeved to that thread size since all information I could find indicated that it was originally Italian threading.  Also, the shell width was too wide at 70.5mm.  That has to be fixed, since the crankset requires a 68mm shell width.  I wound up at Halcyon Bikes in Nashville, TN, and they took care of facing the shell down to 68mm, and while they had the frame they installed the BB cups and the carbon compact crankset (50/34).  Now that this issue is handled, the rest should go fairly quickly as I have the other bits I need for the swap.

First is to move the brake calipers from the CAAD8 to the Merckx.  next will be the front and rear derailleurs, but I need to take a photo of the cable routing so that I can properly set them up.  next will be the handlebars/stem and I’ll probably leave the brifters mounted exactly where they are.  Wheels are easy enough, and the cables/housings are next.  Finally the seatpost and saddle, and it will be rideable.  I will wait to wrap the bars until I have a few miles, to be sure that shifting and braking are correct before covering up the cables.

My first carbon bike – I’m really interested to see what differences I notice between the stiff alloy CAAD8 and the carbon Merckx.  Time and some miles will tell the tale.